


Introduction
Maintaining a clean fuel tank is crucial for the optimal performance of your vehicle. Over time, fuel tanks can accumulate debris, sludge, and contaminants that can clog fuel lines, degrade engine performance, and cause other issues. In this guide, we’ll walk you through the process of manually cleaning your fuel tank, ensuring your vehicle runs smoothly. We’ll also highlight how AQUAQUICK 2000, a highly effective fuel tank cleaner, can aid in this process.
Why Cleaning Your Fuel Tank is Important
The Issues Caused by a Dirty Fuel Tank
A dirty fuel tank can lead to several problems, including:
- Clogged Fuel Lines: Debris and sludge can obstruct fuel flow, leading to poor engine performance.
- Fuel Contamination: Water and other contaminants in the tank can affect fuel quality and engine efficiency.
- Corrosion and Rust: Accumulated moisture can cause rust and corrosion inside the tank, potentially damaging the fuel system.
Benefits of Regular Fuel Tank Maintenance
Regularly cleaning your fuel tank offers numerous benefits:
- Enhanced Engine Performance: A clean tank ensures a consistent and clean fuel supply, improving engine efficiency.
- Extended Fuel System Life: Preventing contamination and corrosion helps prolong the lifespan of your fuel system components.
- Better Fuel Efficiency: Clean fuel reduces the risk of blockages and ensures optimal combustion.
How AQUAQUICK 2000 Can Enhance the Cleaning Process
AQUAQUICK 2000 is designed to break down and remove stubborn contaminants from your fuel tank. Its powerful formulation ensures thorough fuel tank cleaning, leaving your tank free from debris, sludge, and other residues. By using AQUAQUICK 2000, you can achieve a more effective and efficient cleaning process.

Safety Precautions and Preparations
Safety Gear and Equipment Needed
Before you begin cleaning your fuel tank, it’s essential to gather the necessary safety gear and equipment:
- Gloves: Protect your hands from fuel and cleaning agents.
- Safety Goggles: Shield your eyes from splashes and fumes.
- Protective Clothing: Wear long sleeves and pants to minimize skin exposure.
Proper Ventilation and Workspace Preparation
Ensure your workspace is well-ventilated to avoid inhaling harmful fumes. If possible, work outdoors or in a garage with the door open. Clear the area of any flammable materials and keep a fire extinguisher nearby.
Precautions When Working with Fuel and Cleaning Agents
- Avoid Sparks and Flames: Fuel is highly flammable. Keep all sources of ignition away from the work area.
- Dispose of Waste Properly: Collect and dispose of old fuel and cleaning solutions according to local regulations.
- Follow Instructions: Carefully read and follow the instructions on all cleaning products, including AQUAQUICK 2000.
Tools and Materials Needed
List of Tools Required
To clean your fuel tank, you’ll need the following tools:
- Wrenches: For disconnecting fuel lines and removing the tank.
- Siphon Pump: To drain the fuel from the tank.
- Containers: For collecting and storing old fuel.
- Cleaning Brushes: Various sizes for scrubbing the tank interior.
- Towels and Rags: For drying and wiping down surfaces.
Overview of AQUAQUICK 2000
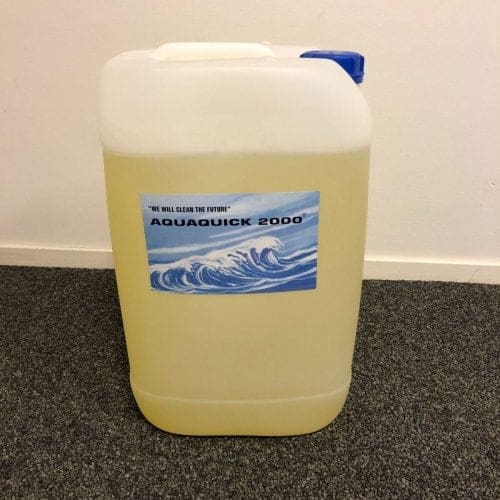
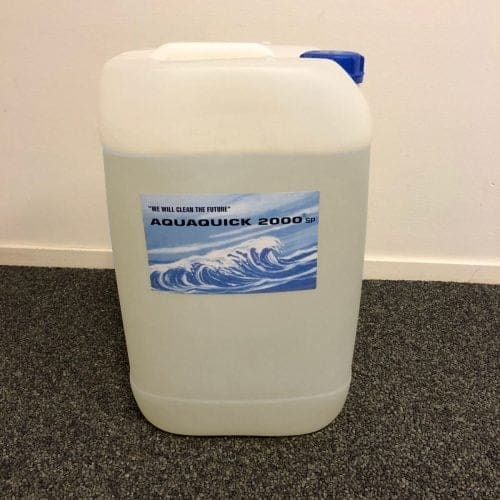
AQUAQUICK 2000 is a powerful and versatile fuel tank cleaner designed to remove even the toughest contaminants. Its biodegradable formula makes it safe for the environment while effectively breaking down sludge, rust, and debris.
Additional Materials
In addition to the tools and AQUAQUICK 2000, you’ll need:
- Water: For rinsing the tank after cleaning.
- Funnels: To help pour liquids into and out of the tank.
- New Fuel: To refill the tank after cleaning.
Draining the Fuel Tank
Step-by-Step Process to Safely Drain the Fuel Tank
- Park the Vehicle: Ensure the vehicle is on a level surface and the engine is off.
- Disconnect the Battery: To prevent any accidental sparks, disconnect the negative terminal of the battery.
- Locate the Fuel Tank: Refer to your vehicle’s manual to find the location of the fuel tank and its drain plug (if equipped).
- Use a Siphon Pump: Insert the siphon pump hose into the fuel tank through the filler neck. Pump the handle to start siphoning the fuel into a container.
- Collect Old Fuel: Ensure you have enough containers to hold all the old fuel. Label and store them safely until you can dispose of them properly.
- Open the Drain Plug (if applicable): If your tank has a drain plug, place a container underneath and remove the plug to drain any remaining fuel.
Importance of Completely Emptying the Tank
It’s crucial to remove all fuel from the tank to ensure a thorough cleaning. Any remaining fuel can dilute the cleaning solution and reduce its effectiveness. By completely emptying the tank, you ensure that AQUAQUICK 2000 can work at its full potential, breaking down all contaminants and residues.

Removing the Fuel Tank (if applicable)
Instructions for Detaching the Fuel Tank from the Vehicle
In some cases, it might be easier to clean the fuel tank if it is removed from the vehicle. Here’s how to do it:
- Consult the Vehicle Manual: Refer to the manual for specific instructions and safety guidelines related to your vehicle model.
- Disconnect Fuel Lines: Carefully disconnect the fuel lines connected to the tank. Use the appropriate wrenches and be prepared to catch any remaining fuel in a container.
- Remove Mounting Bolts: Locate and remove the bolts or straps holding the fuel tank in place. Enlist help if the tank is heavy or awkward to handle.
- Lower the Tank: Gently lower the tank and place it on a flat surface. Ensure it is stable and won’t tip over during cleaning.
Tips for Safely Handling and Storing the Fuel Tank During Cleaning
- Avoid Drops and Impacts: Handle the fuel tank with care to prevent damage.
- Prevent Contamination: Keep the tank covered to avoid dirt and debris from entering.
- Store Safely: If you need to store the tank for any period, ensure it is in a secure and well-ventilated area away from open flames or sparks.
Cleaning the Fuel Tank Interior
Introduction to Using AQUAQUICK 2000 as a Fuel Tank Cleaner
AQUAQUICK 2000 is a powerful, biodegradable cleaning solution designed to effectively remove contaminants from fuel tanks. Its formulation ensures thorough cleaning without harming the environment or your vehicle’s fuel system components.
Step-by-Step Cleaning Process
- Preparing the AQUAQUICK 2000 Solution:
- Follow the instructions on the AQUAQUICK 2000 packaging to mix the correct ratio of cleaner to water.
- Use a clean container to prepare the solution, ensuring it’s well-mixed.
Applying the Solution Inside the Tank:
- Pour the AQUAQUICK 2000 fuel tank cleaner into the fuel tank.
- Allow the solution to sit for the recommended time to break down contaminants. This typically ranges from 30 minutes to an hour, but refer to the product instructions for exact timing.
Using Brushes and Tools to Scrub the Tank:
- Use long-handled brushes and scrubbing tools to reach all areas of the tank interior.
- Pay special attention to corners and crevices where sludge and debris often accumulate.
- For stubborn spots, use additional AQUAQUICK 2000 solution and let it soak before scrubbing again.
Rinsing and Drying the Tank Thoroughly:
- After scrubbing, thoroughly rinse the tank with clean water to remove all traces of the cleaning solution and loosened contaminants.
- Allow the tank to drain completely.
- Use clean towels or rags to dry the tank interior, ensuring no moisture remains.
Inspecting and Cleaning Fuel Tank Components
Cleaning the Fuel Pump, Fuel Lines, and Fuel Filter
Fuel Pump:
- Carefully remove the fuel pump from the tank.
- Use a soft brush and AQUAQUICK 2000 solution to clean the pump.
- Rinse with clean water and allow to dry before reinstallation.
Fuel Lines:
- Detach the fuel lines and inspect them for blockages or damage.
- Flush the lines with AQUAQUICK 2000 solution followed by clean water.
- Ensure the lines are completely dry before reconnecting.
Fuel Filter:
- Replace the fuel filter if it’s clogged or damaged.
- If reusable, clean it according to the manufacturer’s instructions using AQUAQUICK 2000.

Checking for Signs of Damage or Wear
- Inspect all components: Look for signs of wear, corrosion, or damage on the fuel pump, lines, and filter.
- Replace as needed: Any damaged or excessively worn parts should be replaced to ensure optimal performance and safety.
Reinstalling the Fuel Tank
Reattaching the Fuel Tank to the Vehicle
- Position the Tank: Carefully lift and position the tank back under the vehicle. Ensure it’s aligned with the mounting points.
- Secure with Bolts or Straps: Reattach the mounting bolts or straps, tightening them securely to hold the tank in place.
- Reconnect Fuel Lines: Attach the fuel lines back to the tank, ensuring all connections are tight and leak-free.
Ensuring All Connections are Secure
- Double-check Connections: Verify that all fuel lines and electrical connections are secure and properly attached.
- Reconnect the Battery: Once everything is reinstalled, reconnect the negative terminal of the battery.
Refilling the Tank with Fresh Fuel
- Add New Fuel: Pour fresh, clean fuel into the tank. Use a funnel to prevent spills.
- Check for Leaks: After filling the tank, check for any signs of leaks around the tank and fuel lines.
Post-Cleaning Maintenance Tips
Regular Maintenance Practices to Keep the Fuel Tank Clean
- Use High-Quality Fuel: Always fill up with high-quality fuel to reduce the risk of contaminants.
- Regular Inspections: Periodically check the fuel tank, lines, and filter for signs of debris or damage.
- Additives: Consider using fuel additives designed to keep the fuel system clean and prevent buildup.
How Often to Use AQUAQUICK 2000 as a Preventive Measure
- Preventive Cleaning: Use AQUAQUICK 2000 periodically as part of your maintenance routine. Depending on vehicle use and fuel quality, a thorough cleaning every 12 to 24 months is advisable.
Monitoring for Signs of Fuel Contamination
- Watch for Symptoms: Be alert to symptoms of fuel contamination, such as rough idling, decreased fuel efficiency, and engine misfires.
- Prompt Action: If you suspect contamination, use AQUAQUICK 2000 to clean the fuel tank and address the issue promptly.
Troubleshooting Common Issues
Common Problems Encountered During and After Fuel Tank Cleaning
- Fuel Odors: Persistent fuel odors after cleaning could indicate residual contaminants or leaks.
- Engine Performance Issues: If the engine runs poorly after cleaning, check for air pockets in the fuel lines or improper reconnections.
Solutions and Tips for Addressing These Issues
- Fuel Odors: Recheck all seals and connections for leaks. Ensure the tank is thoroughly dried and free of any cleaning solution residue.
- Engine Performance: Bleed air from the fuel lines if necessary and ensure all components are properly reinstalled.
When to Seek Professional Help
- Persistent Issues: If you encounter persistent problems or are unsure about any step of the cleaning process, seek professional assistance.
- Complex Repairs: For complex fuel system issues or extensive damage, professional diagnosis and repair may be necessary.
Conclusion
Maintaining a clean fuel tank is essential for the health and performance of your vehicle. By following this comprehensive guide and using AQUAQUICK 2000 as your go-to fuel tank cleaner, you can ensure your fuel system remains in top condition. Regular cleaning and maintenance not only improve engine efficiency but also extend the life of your fuel system components.